A Simple Guide on Self Closing Gate Installation

Trying to know how to do a self closing gate installation? Learn how to install it with safety standards, cost details, and instructions for use.
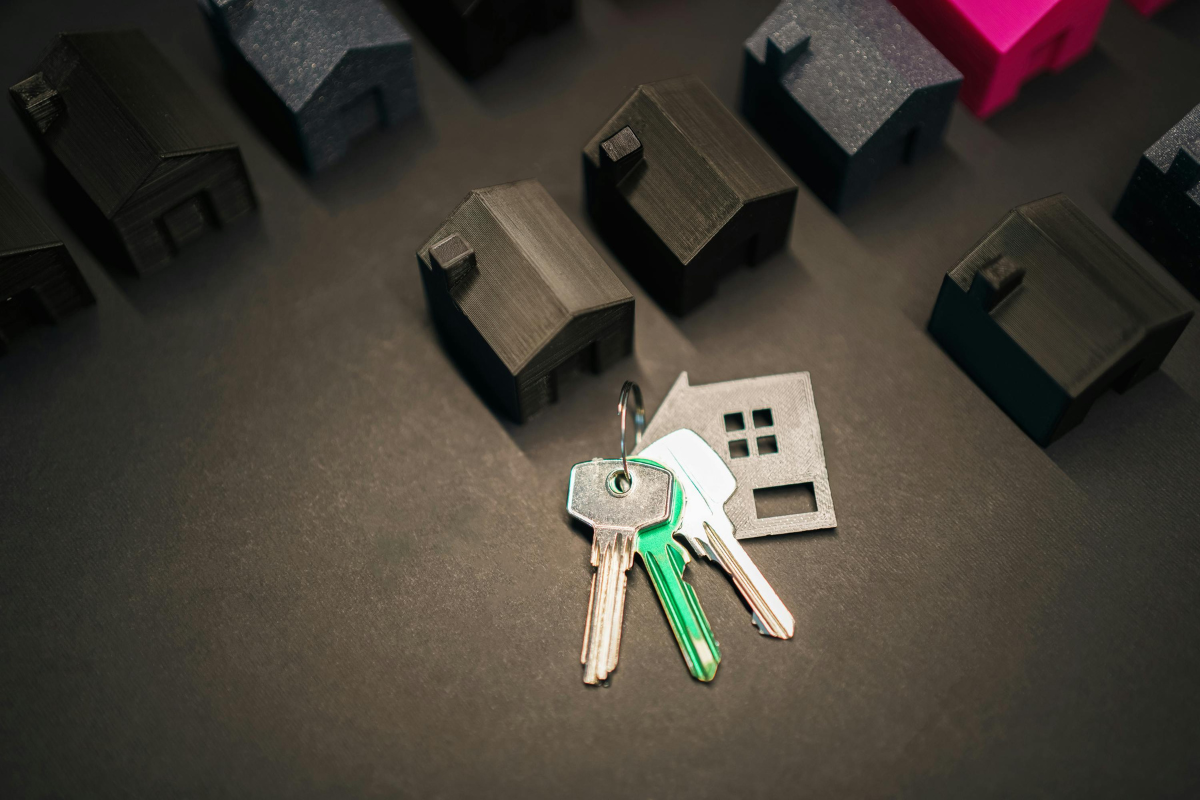
For years, I thought a regular latch was “good enough.” Then I read the data by the CDC on drownings and saw how fast a kid can slip through an open gate.
I really felt awful.
Since then, I’ve switched to self closing gates, especially around my pools.
I mean, if you’ve ever chased a gate in the wind or worried about a child slipping through an open backyard gate, you get why self closing gates are important.
They shut automatically, with no reminders or second chances.
It’s just so convenient. But much more than that, it’s about safety, compliance, and peace of mind.
And there are top self closing safety gates built to meet strict safety codes and last for years.
Installing one isn’t too complicated, but at the same time, it’s not an easy job either.
Do it wrong, and you risk failure, injury, or code violations. Do it right, and you’ve got a system that works silently and reliably for years.
This simple guide will help you understand self closing gate installation and other key information.
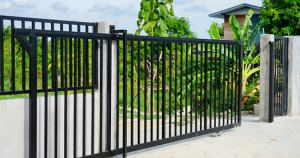
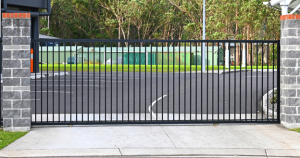
What Is a Self Closing Gate?
A self closing gate automatically shuts after someone passes through. It uses a spring, hinge, or gravity mechanism to close without manual help.
These are common at pools, warehouses, rooftops, and driveways.
OSHA (Occupational Safety and Health Administration) requires self closing gates where there’s a fall risk of 4 feet or more.
That includes ladder openings, roof hatches, and platform edges. The gate must swing or slide away from the hazard so it doesn’t trap someone inside.
This is a legal requirement in most workplaces.
These gates are also required around swimming pools in many states.
For example, Arizona law mandates self closing pool gates to prevent child drownings. They must latch automatically and open outward from the pool area.
Why Install One?
Gates that don’t close on their own are dangerous.
A 2023 report by Gate Safe stated that over 90% of commercial automated gates are unsafe, mostly due to poor closing mechanisms or missing safety features.
And the risks are real.
Since 1985, there have been 32 deaths linked to automatic gates, with nearly 25,000 injuries every year, including 9,000 involving children, according to the U.S. Consumer Product Safety Commission (CPSC).
Many of these could’ve been prevented with proper self closing systems.
For homes, it’s about more than rules. It’s about knowing your gate shuts every time.
No more worrying about pets escaping, kids wandering into the street, or strangers entering your yard.
For businesses, it’s about compliance, liability protection, and worker safety.
What You’ll Need to Install the Gate Properly
Hardware (pick what fits your gate style):
- Self-closing hinges (tension-adjustable) or a gate closer
- Self-latching latch, ideally key-lockable for pools
- Rust-resistant screws or bolts (stainless or hot-dip galvanized)
- Shims and a square for alignment
- Drill or driver, bits, wrench set
- Tape measure and pencil or marker
Pre-checks that save headaches:
- Post strength: A Shaky post leads to a slack gate later. Reinforce before anything else.
- Gate weight: Make sure the hinge or closer rating matches the gate’s weight and width.
- Clearances: The typical side gap target is about ½ inch or less, so the latch can grab.
- Swing direction: For pools, the gate should swing away from the water, per CPSC/ISPSC recommendations.
Step-By-Step: Self Closing Gate Installation
Take note of the steps for self closing gate installation:
1) Mark hinge positions
- Hold the gate in the opening with your ideal bottom clearance (often 2–4 inches above grade to avoid drag).
- Place the top hinge a few inches down from the top rail; the bottom hinge a few inches up from the lower rail. This spreads the load and reduces twist.
- Mark pilot holes.
Note: If you have a heavy gate, use a jack, wood blocks, or a second set of hands. Your hinges will thank you later.
2) Mount hinges loosely
- Drill pilot holes to the hardware maker’s spec.
- Fasten the hinge leaves to the post first, then to the gate.
- Keep screws snug but not fully tight; you’ll need wiggle room for alignment.
3) Set your swing and gaps
- Check the swing path. The gate should open fully without hitting the grade or a stopper.
- Adjust the side gap so the latch will land cleanly. Use shims if needed.
- Square the gate (vertical and horizontal). Tighten all hinge fasteners.
4) Install the self-latching latch
- Mount the latch on the pool-away side, high enough to keep it out of small kids’ reach if this is a pool. (Local code may set latch height and release location, and many states use ISPSC language.)
- Align the strike so the latch clicks closed with a gentle swing.
- If it’s lockable, test the key or button.
5. Tension the closing action
- If you’re using tension hinges, add preload using the included tool.
- If you’re using a gate closer, adjust the speed and power screws.
So that from a low open angle (about 30–45°), the gate should shut and latch every time without slamming.
6. Test like you’re trying to beat it
- Open from different angles.
- Let it go from low force.
- Check windy-day behavior if you can.
- Confirm the latch catches every single time.
7. Add final safety touches (especially for pools)
- Be sure that the lock function is working.
- Confirms that it opens away from the pool.
- Any climbable items near the fence (furniture, planters) should be moved.
Cost of Installation
You’re probably wondering: how much will this cost? Well, based on the figure on Builds & Buys, here’s what it costs:
- Single gate installation: $200–$500
- Double gate installation: $400–$800
- Premium gates (auto-openers, high-end materials): $600–$1,200
Automatic self closing gate closers cost $200–$600. Sensor gates range from $200 to $2,000, depending on features.
Permits and inspections can add to the cost, especially in areas like Las Vegas or historic districts.
Homeowners Association (HOA) may also have rules that affect design or materials.
But you must know that cheap hardware fails fast. Low-quality hinges and latches often break within two years.
Spend a little more upfront for durable, code-compliant parts.
Conclusion
A self closing gate is a safety essential. And installing a self closing gate correctly is also important.
Doing it right means following codes, using strong materials, and testing thoroughly.
Take your time. Measure twice. Use quality hardware. And don’t skip small details like gap spacing or torque specs.
A self closing gate installation done well can last for decades and prevent accidents.