Drywall Repair and Finishing: Fix Issues With Perfect Finish

There are several common drywall repair and finishing mistakes that occur in construction or renovation projects. Learn how to fix them with a perfect finish.
To achieve a smooth and perfect finish for your wall, it’s essential to know how to patch the drywall properly.
Most of the time, no matter how careful you are in the process, you may end up not getting the smooth finish you desire.
That’s why it’s better to leave it to the professionals, rather than constantly trying to make it work without much success.
Having a professional, like Irving Drywall Repair and Painting, to handle your drywall repair and finishing saves you money in the long run.
We’ve been in the business of drywall repair and painting in Irving TX, for over 15 years.
We can assist with both large drywall jobs and small drywall repairs, and we can manage your project from start to finish.
We can also repair any water damage you would like to have fixed.
In this post, we’ll show you how to do perfect drywall repair and achieve a smooth finish.
What is Drywall?
Drywall is a building material, also called plasterboard or gypsum board.
It’s made from a core of gypsum plaster inserted between two layers of thick paper.
It is used to construct interior walls and ceilings.
It provides a quicker, cleaner, and more efficient alternative to traditional methods like brick-and-plaster.
Drywall is durable and quite easy to install. It comes in various types for different needs, such as moisture-resistant or fire-rated options.
Types of Drywall Damage and What Causes Them?
Drywall repair is usually messy because of the different dents and holes.
It’s also important to determine the exact type of damage and how bad it is so you can do a smooth repair job.
Understanding the size and cause of the holes helps you choose the right repair method.
Among the many drywall problems are drywall holes.
Drywall holes are different in size, and several factors cause this to happen. Here are the different sizes:
- Small Holes: They are usually less than 1 inch in diameter because they’re commonly caused by nails or screws. This size of damage is easy to repair with minimal tools.
- Medium Holes: These holes usually range from 1 to 3 inches. It’s mostly caused by minor accidents, like a doorknob hitting the wall. You’ll need more effort to patch this up, but is still manageable.
- Large Holes: They usually go beyond 3 inches in diameter, and you’ll have to cut and replace the drywall sections. Such large holes can be caused by deliberate changes, plumbing work, or accidents.
How to Assess the Damage
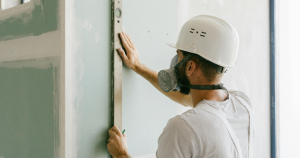
Before you begin any repair, you have to assess the damage properly.
Here is what you need to do:
- Examine the nearby area: There can be hidden problems that you might have to fix before you patch the drywall, so carefully look for signs of moisture, mold, or structural issues.
- Check for cracks: If you notice any small hairline cracks, you may not need to repair them immediately; just monitor them closely. The crack can mean movement in the structure.
- Evaluate how bad it is: Before doing anything, check if you can fill the hole with a simple joint compound or if a section of drywall needs to be replaced.
Taking these steps will make you tackle the visible damage and any hidden issues that could later affect your repair.
How to Do a Drywall Repair
Understanding the patching process is important to achieve a smooth surface.
Each step needs to be followed to produce a smooth look that blends with the existing wall.
Here’s how to go about it:
Process 1: Patching both small and large holes in drywall
For small holes: First, gather your materials: a putty knife, drywall compound (or spackling), and sandpaper.
Then, use your putty knife to apply a thin layer of drywall compound, pressing it into the hole.
Allow it to dry completely, which may take a few hours.
For larger holes: cut a patch from a new piece of drywall, ensuring it fits neatly. Use drywall screws to make it tight.
Then, apply joint tape around the edges and cover it with drywall compound.
Apply many thin layers. But allow each coat to dry before adding another.
The purpose of this is for it to blend smoothly with the surface.
Process 2: Sanding for smoothness
This next process is crucial to achieving a smooth finish and must be done immediately after the last coat of compound has dried.
You need a fine-grit sandpaper (around 120-220 grit) for this process. Gently sand over the repaired area in circular motions.
Try to flush the new compound with the surrounding wall without spoiling it.
Clean the area with a wet cloth to wipe off any dust, so that when you want ot prime or paint, you’ll have a clean surface.
Sanding the repaired area properly will allow you to achieve a spotless drywall repair finish.
Don’t forget to put on a mask to avoid inhaling dust particles during this step.
How to Achieve Clean Finishes
Firstly, you need to remove the gum from the wall. Mix warm water and vinegar or a commercial gum remover.
Use the mixture with a sponge or plastic scraper to gently scrub the wall.
Also, always sand in between compound layers for a smoother finish.
Lastly, ensure to do priming before painting so you can get the same color.
Why You Should Call the Professionals
At Irving Drywall Repair and Painting, you can be sure that we’ll solve anything that has to do with your plasterboard repair needs quickly and professionally.
We do our services, like drywall installation and texturing, for the exact price quoted to you.
As a local drywall service company, we are committed to having your best interests in mind.
And every job we do for you will always be precise to meet your expectations.
As a professional drywall installer, we don’t do one job twice.
We have the knowledge to complete a drywall job correctly the first time, without straining your finances.
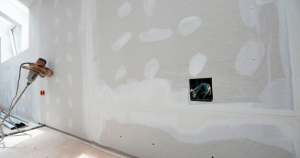
If the job isn’t done well, it’ll be very obvious even after painting because the incorrectly placed mud or tape will still be visible.
At Irving Drywall Repair and Painting, we’ll take care of every smallest detail of your drywall needs.
If you need more than just drywall repairs, you can contact us for our full services as Texas’s top water damage drywall repair service.
Conclusion
These techniques on drywall repair and finishing can help you if you put them into action.
Applying these tips, your drywall repairs will look flawless and last longer.
And if you think that’ll be too much trouble to do alone, we’re here to help fix that drywall and give it a perfect finish.